I'll start with a quick explanation. When I see ideas I like, I copy and paste the picture in a word document and save the document under "My Faves" with the name of the stamp set, accessory, technique, or whatever the pictures have to do with as the title. So for this class, I have a word doc called "Billboard Alphabet die ideas." When I was looking at it, I could tell the picture I had copied and pasted of the card I CASEd below had something a little different about the letters, but I couldn't tell what. Well, the original creator, mjw, used Baja Breeze colored DSP in her card. In the smaller picture I had saved, it looked to me like she had used the negative image of the cut out letters and sponged them in. So that's what WE did at my class.
Sunday, May 31, 2009
May Big Shot Club meeting
I'll start with a quick explanation. When I see ideas I like, I copy and paste the picture in a word document and save the document under "My Faves" with the name of the stamp set, accessory, technique, or whatever the pictures have to do with as the title. So for this class, I have a word doc called "Billboard Alphabet die ideas." When I was looking at it, I could tell the picture I had copied and pasted of the card I CASEd below had something a little different about the letters, but I couldn't tell what. Well, the original creator, mjw, used Baja Breeze colored DSP in her card. In the smaller picture I had saved, it looked to me like she had used the negative image of the cut out letters and sponged them in. So that's what WE did at my class.
Saturday, May 30, 2009
It's been a bright SUNSHINE-y day!
This morning I held my Stampin' Scrapfest 2009. I had five ladies in attendance, two of whom were first time crafters with me. We used elements from the Sunshine Garden Simply Scrappin' Kit to complete our projects. I charged $10.00 for the class, and offered a choice of three different projects. I also allowed them to make more than one project for an additional $5.00 per project.
Their first choice was eight 12"x12" scrapbook pages.
If you are interested, I still have four kits available. You can choose any of the three options. The cost is $10.00 for your first kit, $5.00 for each additional kit, and $3.00 per kit for shipping. I will include close-up pictures and any necessary instructions. These kits are available while supplies last. Click on the "Email Me" button toward the top of the right hand side bar to order.
Sweet wishes!
Thursday, May 28, 2009
Not your typical wedding card
Sweet wishes!
Wednesday, May 27, 2009
My own paper parade
You see Cheryl found me via the Demonstrator Locator and wanted to become a demonstrator, so she was familiar with the company and had done some paper crafting before; Julie had been stamping for years, and in fact, her mom once owned a stamp store, so when she found out about the demonstrator opportunity, she almost immediately jumped on board; but Beth...to think that I totally introduced her to stamping and Stampin' Up!, and then to look at her now. She is constantly creating beautiful art and inspiring me with everything she posts on her blog.
So a few weekends ago Beth participated in the Parade of Papers blog hop. Here is her entry. I was inspired to create a desk set for DJ's teacher, Miss Tallie, for her end-of-the-year gift. Below is a picture of the whole set, and then I have some close-up pics of everything but the pen.
And what gift is complete without a coordinating card and gift bag?
Sweet wishes!
Tuesday, May 26, 2009
Hinged So Bashful Pumpkins
And on Wendy's video tutorial, she shows how she covered up the back of the brad so it isn't showing and adds a bit of decroative element to the back, where you would write a note if you so chose. So I used her idea for the back of my card too (as seen to the right).
Sweet wishes!
Saturday, May 23, 2009
Baby clothes & Rock 'n' Roll
Here we have my first submission for Libby's anniversary celebration of her From Courtney's Closet challenge. I chose to take my inspiration for this card from Courtney's 7-month pose on the pier in Cape Cod. When Libby used that picture for a previous challenge, she said she was feeling inspired by the red, white, and blue (though the blue is turquoise, and the red appeared to be Rose Red on my monitor), and on this Memorial Day weekend, I feel it is equally appropriate. I made another attempt at the faux seersucker technique for my stamped panel, but it just looks crimped. The ric-rac is from an old ribbon originals pack and was Cool Caribbean, but I colored it Tempting Turquoise with my marker. The ribbon knot on the button was from a different ribbon originals pack. I finally used one of my Basic Jumbo Grommets after I watched this video on Linda Heller's blog and discovered just how easy they are to use. The layout for this card came from a sketch challenge on SCS-SC159.
Sweet wishes!
Mojo Monday on a Friday...
Yesterday, I got to play along with a few challenges. When I first started participating in challenges, I felt like I had to make a separate card for each challenge, but now I thrive on combining challenges. Not just because it saves time, or because I'm already up to my eyeballs in cards, but because it sometimes makes the challenges more challenging.
Mojo Monday is a blog devoted exclusively to a weekly sketch challenge, which is posted every Monday. If you're ever feeling like you're in a slump, go take a look and see if your creative juices are replenished. Plus, they have a monthly contest. Anyway, this card is for week 87. Beth participated last week, and her cute creation swayed me to join in this week.
The colors: Pretty in Pink, Rose Red, Regal Rose, Chocolate Chip, & Kiwi Kiss, came from a Creative Color Challenge issued by Jaron Winder. Jaron is a former employee of Stampin' Up! He led many classes and demonstrations at Stampin' Up! training events including Regional Seminars, Leadership Conference, and Convention. He has a terrific personality, which I would describe as super friendly and HIGHLY ENERGETIC. His blog, Jaron's Junk Drawer, is full of hilarious anecdotes about his way-too-cute kids. I participated in Jaron's first Creative Color Challenge too with the card found in this post.
After I finished the card for the Mojo sketch, I saw something sitting on my desk that I knew would provide the perfect finishing touch, so I added this:
Btw, the stamp sets I used are Sweet Stems and Matchbox Messages, and the DSP is Raspberry Tart~remember, now through May 31, you can buy 3 packs of Designer Series Paper or Textured Card stock and get a 4th pack FREE!
Sweet wishes!
Just call me Mary
A little over a month ago, a good friend of mine from high school came to visit and help me plant my first garden. Even she, who has gardened oft times before, was not prepared for my big dreams of vegetable delight. Yes, as I told a new blogging buddy, I've been stifling this post of my journey toward becoming a novice gardener for a while now, but at the bottom of this LONG (sorry) post, you'll see why I decided to blog about it now. So let me tell you about the pictures in the collage above (right click and "open in a new tab" to view it larger and reference back and forth). Starting in the upper left corner and working clockwise: 1) Before we started the garden, we created a compost heap. When my friend visited a year & a half ago we dug a few holes for compost, but when they got filled up, Michael and I just started tossing our compost material into the woods, so now we again have a place where it belongs. 2) Me digging up the front border of the garden. 3) Here are the seedlings we purchased—2 banana pepper plants, 9 bell pepper plants, 8 cucumber plants, 9 tomato plants (5 different varieties), 6 summer squash plants, a bunch of onions. And that doesn’t include the seeds that I planted, so you can why my friend was a bit overwhelmed by my lofty goals. 4) Me planting. {Do you see the THICK mud caked on my work gloves and up the side of my shoe?} 5) A cucumber plant. 6) Michael tilling. 7) Our mulch—my friend suggested spreading news paper between the rows and around the base of the individual plants for the purposes of mulch {to keep weeds from growing, help the plant retain moisture, and prevent the soil from washing away…just in case you are not keen to the purposes of mulch, which I wasn’t}; however, we don’t subscribe to the paper, but I DO have quite a bit of packing paper from all my Stampin’ Up! orders!!! This paper is similar to the material of paper bags, so we decided it was totally usable. 8) The plot, after the first tilling and raking, with a cow in the background.
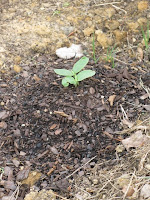
Now here's the garden at 1 week, and a Roma tomato plant at the end of the tomato row.Here's week 2. I went back and forth between taking pictures on Monday or Thursday, because Monday is the day when we had finished planting all the seedlings and the back row of seeds (butternut squash, pumpkins, and sunflowers), but Thursday was the day I planted the last of the seeds. So the week 1 pics were taken on Monday, April 27, and the week 2 pics were taken on Thursday, May 7. The same Roma plant and my first sprouts-cantalope!
I seem to have missed Monday & Thursday of week 3, so here are pics from Monday, May 18~week 4. Same Roma plant, and this time some zucchini sprouts!
And today we went out to tackle the weeds that are attempting to take over the garden (I've been bad about weeding) and found these on that now famous Roma plant.
Sweet wishes!
ps. Yes, that wheel barrow sat in the corner of the plot for 4 weeks. It's gone now, though.
Wednesday, May 20, 2009
CRAZY (for more than just Cupcakes)
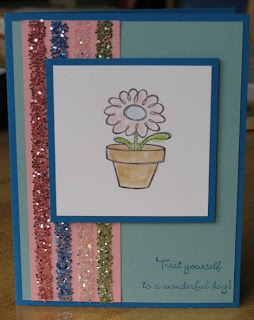
Anyway, here are the samples from my May preorder class featuring the Crazy for Cupcakes stamp set. Since we had just done the window sheet class two days before, I was still having fun playing around with my Clearly Thanks printed window sheets, so I called my class and asked them to bring their scraps from the previous class to use. And again, I decided to complete an SCS challenge while creating my sample for the class. You can view our first project in my SCS gallery by clicking here.
Normally, I like to keep my class projects a secret until I demonstrate them at the class, but I actually previewed our second project. It is the first card seen in this post.
So for our third project I decided to do a masculine card. The Parisian Breeze Specialty DSP (which is part of the May special~Buy 3 packs of Designer Series Paper or Textured Card Stock and get a 4th pack FREE!), has some great masculine patterns. I CASEd this card by missir.
Monday, May 18, 2009
Clearly Cool!
So our second project was this transparent box that we made using the thick window sheets and the Box #2 bigz xl die. We added some rub-ons and (retired) ribbon for the finishing touch.
Friday, May 15, 2009
A "couple" of birthdays
So this first one is for my brother. I hope he doesn't kill me for sending him a glittery card, but I think it still has plenty of masculine tone to it.
Thursday, May 14, 2009
Two NEW challenges—in one
I used the colors and the ice cream cone from her shirt as the theme for my design. I also took inspiration from the two tone turquoise & teal of her skirt for my card base.
The second challenge is from The Corrosive Challenge Blog, and is challenge #11, which is a sketch challenge. This was a super fun sketch to work with, and one I will certainly refer back to in the future. Thank you, Beth, for sharing this challenge with me. IF my card is randomly selected as the winner, I will receive a FREE BLOG BANNER by Michelle Laycock! (And then what's to stop me from having a complete blog makeover?!?)
Thanks to Libby and Janet for these two fantastic challenges! I look forward to playing along with both of you in the future!
Sweet wishes!
Wednesday, May 13, 2009
Big Shot Club projects-Scallop Envelope
Interspersed throughout the projects that we made, I also demonstrated a few additional ideas for using this ultra-versatile die. Here's a great Halloween card CASEd from sarahm's card seen here.
Our next Big Shot Club Meeting is this coming Sunday, May 17, from 3:00-4:30pm. It will feature the Billboard Alphabet Decorative Strip sizzlit die. If you are interested in attending just let me know by Saturday evening. You can call or click the Email Me button in the right side bar. The class fee is just $5.00 with the one-time club membership fee of $20.00.
Sweet wishes!
Tuesday, May 12, 2009
I think it's safe
This first one was for a dear friend of mine. I found the 'M{flower}M' idea two years ago, but already had a plan for my cards that year, and then came up with another cool idea last year, so I was finally able to incorporate the idea into this card (and the bottom one) this year. I used the Bilboard Alphabet decorative strip sizzlit die for the 'M's, and a Felt Fusion flower for the 'O.'
My "Granny" received this card. Don't tell her, but I already had all the elements made and just had to stick them together for this card. I cut the oval frame and scalloped oval to make Thank You cards last May. For some reason, I had this one left over. I dry embossed the rectangle frame on the Vanilla CS sometime ago too. I don't remember what it's original purpose was, but I grabbed some Pale Plum CS for my card base, assembled my layers, and voila! I stamped "Happy Mother's Day" inside in Perfect Plum.
This was the card I made for my mom, and my MIL's was identical. Like I said before, I found the original idea for this card about 2 years ago, here on SCS. The 'M's were cut using my new Serif Alphabet bigz dies, and the flower is the largest one from the Pretties Kit. I used a Baja Breeze corduroy button from the Occasions Mini for the center and the Eyelet border punch for the decorative edges of the Pink Pirouette CS. This card fit in a standard business size envelope, so it was 4"x9 1/4."
Sweet wishes!